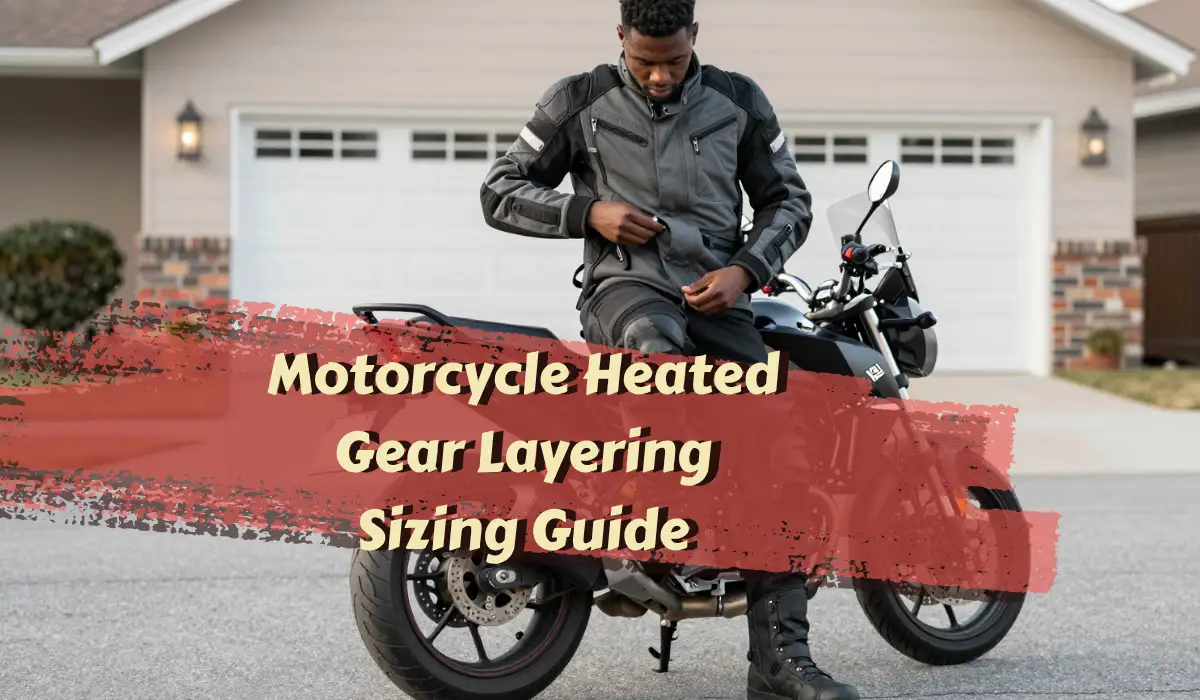
Is motorcycle heated gear layering and sizing really that important? Yes. Strong heated gear still feels weak when the liner is too loose, the gloves are too tight, or the outer shell leaks wind faster than the heating elements can keep up.
This guide shows the layer order and fit rules that keep active heat on your body instead of wasting power into empty air. If you are still choosing the actual garments, start with the main heated motorcycle gear guide and the 12V vs 7V vs 5V heated gear breakdown.
Jump Ahead To:
Why Heated Gear Fails Even When It Turns On
Heated gear does not work in a vacuum. You are still fighting:
- wind stripping heat away from the shell
- sweat cooling the skin
- air gaps between the heater and your body
- circulation problems caused by over-tight layering
That is why some riders buy more wattage and still ride cold. The electrical part may be fine. The real problem is often fit, shell choice, or layering order.
Sweat Control Is Not Optional
Cold-weather riding is not only about outside temperature. Sweat makes the whole system worse.
That is why base-layer choice matters so much. Cotton holds moisture and turns into a cold sponge once it gets damp. Synthetic or merino base layers move moisture better, which keeps the heated layer from fighting your own sweat at the same time it is trying to fight the weather.
The 3-Layer Heated System That Works
Layer 1: wicking base layer
The base layer touches the skin, so its job is moisture control. Synthetic or merino works well here. Cotton does not. Once cotton gets damp, it stops helping and starts pulling warmth away from the body.
Layer 2: heated layer
This is the active part of the system: jacket liner, vest, pants liner, gloves, socks, or insoles. It works best when it sits close enough to transfer heat instead of floating away from the body.
Layer 3: protective outer shell
The shell has to block wind and, ideally, water. If the shell flows too much air, especially on a naked bike or at highway speed, the active heat has to fight a losing battle.
That is why the heated jacket liner guide and the heated vest guide only make full sense when the shell over them is doing its job.
Why Wind Exposure Changes Everything
Riders on faired touring bikes can sometimes get away with lighter heated setups than riders on naked bikes, dual-sports, or bikes with minimal wind protection. The reason is simple: wind exposure changes how hard the active heat has to work.
That matters because riders often compare gear without comparing bikes. A vest that feels great behind a larger screen can feel weak on a naked bike where shoulders and arms are taking the full hit. The same thing happens with hands. Grip heat and liners that feel acceptable in one wind environment can fall behind fast in another.
If the bike flows a lot of air, lean harder on shell quality and coverage before assuming the heated layer itself is the only problem.
Layering Has to Change With Temperature and Speed
Many riders treat layering like a fixed recipe. It is not. The right stack for a cool commute is not always the right stack for a long highway ride in real winter wind.
In lighter cold, a thin wicking base, a close heated layer, and a decent shell may be enough. Once speed rises or the temperature drops harder, the shell starts mattering much more. That is when weak cuff seals, leaky collars, and too much airflow through the jacket make even good heated gear feel half as strong.
This is why riders get confused by their own setup. The same liner can feel great one day and weak the next even before anything breaks. The layer order did not change. The wind load and the ride conditions did.
Torso Sizing Rules
Heated liners should fit snug over one thin base layer. The goal is close contact, not loose comfort like a casual hoodie.
If you size up just to fit thick layers underneath, two bad things happen:
- heat transfer drops because of the growing air gap
- armor and shell fit can shift away from their intended position
A good check is your riding posture. Reach for the bars, turn your head for shoulder checks, and make sure the outer armor still sits where it belongs instead of getting pushed around by extra bulk.
Fit Check in Real Riding Posture
Try the whole setup in the position you actually ride in. Standing in the garage with your arms down tells you almost nothing.
Reach to the bars. Rotate through a shoulder check. Sit back against the seat if the bike puts you in that position. The heated layer should stay close, the shell should still close comfortably, and the armor should still sit where it belongs.
If the jacket rides up, the cuffs bind, or the shoulders feel packed full, the fit problem is already telling you something. Fix it there instead of hoping the heated layer will somehow disappear on the road.
Hands: Heated Gloves vs Heated Liners
This is where a lot of winter setups fail. Heated glove liners seem simple, but they only work well if the outer glove still leaves room for circulation and insulating air space.
If you stuff a heated liner into an already-snug outer glove, you create glove compression. That cuts circulation and can make your hands feel colder even with the power on.
That is why many riders are happier with a dedicated glove from the heated glove guide instead of forcing a liner into a glove that was never sized for it. If your palms stay cold even with the right glove, the heated grips guide can help fill that gap.
Core Heat Helps the Hands and Feet Too
Riders sometimes chase hand heat forever while the real problem starts at the core. Once the body feels cold enough, it protects the torso first and gives less blood flow to the extremities.
That is why a better torso setup can make the whole system feel warmer, even before you change the gloves or socks. It does not replace dedicated hand and foot heat, but it changes how hard those pieces have to work.
Feet and Lower Body
Heated socks and insoles change boot fit more than riders expect. Heated socks add thickness. Heated insoles change stack height. Either one can create pressure points in a rigid motorcycle boot.
If your feet still go numb with the heat on, do not assume you need more power first. Check:
- boot volume
- pressure across the forefoot
- calf strap or battery placement
- whether the rest of your lower-body system is staying warm
That is where the heated socks and insoles guide and the heated pants liner guide need to be looked at together instead of in isolation.
Seat, Knee, and Tank Contact Change Lower-Body Fit
Lower-body heated gear does not only have to fit while standing. It has to fit once the rider is bent at the hips, knees are tucked, and the seat is pressing the whole lower half of the system into one position for miles at a time.
That is why pants liners and heated insoles can feel fine in a quick try-on and then become annoying after twenty minutes on the bike. Knee armor, seat pressure, and tank contact all change how the layers sit once you are actually riding.
If lower-body heat feels weird, cramped, or weaker than expected, do not look only at the garment. Look at what the riding position is doing to the garment.
Pressure Checks for Gloves and Boots
If a heated layer makes the glove or boot tighter, pay attention right away. Small pressure changes matter more than most riders think.
A glove that feels only a little tighter in the garage can become a circulation problem once the ride is long and the temperature drops. A boot that feels only slightly tighter across the forefoot can turn warm feet into cold feet because blood flow and air space are already marginal.
That is why fit checks need to happen in real riding posture, with the socks, liners, and shells you actually plan to use.
Battery Gear vs 12V Gear in the Layer Stack
Battery-powered heated pieces change the layer stack differently than 12V liners do. They add battery pockets, strap placement, and sometimes more bulk at the calf, waist, or side seams.
12V liners are often cleaner inside the clothing system because they move the power source off the body and onto the bike. The tradeoff is the tether and wiring plan. Battery gear is more portable, but it can create fit problems in places that are easy to ignore during a quick try-on.
That is why a battery vest or socks can feel great standing still and then become annoying once you are actually seated, zipped up, and dealing with pants, boots, armor, and a riding posture.
Rain Changes the Whole Stack
Cold rain exposes layering mistakes very quickly. Once the shell wets out, the rider sweats, or water starts sneaking through openings, the heated layer has to work much harder just to keep the body even.
That is why rain planning belongs inside layering planning. A good heated layer under a weak shell is still a weak wet-weather system. If the jacket is soaking up water, cuffs are leaking, or the neck seal is poor, more heat usually feels like a partial fix instead of a full one.
The point is not to pile on more insulation every time rain shows up. It is to keep the layer stack dry enough and tight enough that the heated piece can do its actual job.
Pre-Ride Layering Checklist
- wear a wicking base layer under heated garments
- keep heated layers close without restricting movement
- check armor alignment in actual riding posture
- seal cuff, collar, and waist gaps
- confirm glove dexterity and circulation at the bars
- confirm boot volume if using heated socks or insoles
- set controller zones before heavy traffic, not during it
If the setup is wired to the bike, make sure the physical install is also sorted with the heated gear wiring guide and the heated gear controller guide.
Do a 15-Minute Garage Fit Test Before the First Cold Ride
The best time to find out your heated setup is wrong is not twenty miles into a cold ride.
Do a short full-kit test at home. Put on the base layer, heated piece, shell, gloves, and boots you actually plan to ride in. Sit on the bike. Reach the bars. Work the levers. Turn for shoulder checks. Put your feet on the pegs.
What you are looking for is simple:
- no cuff bind
- no chest bunching
- no tight boot pressure from socks or insoles
- no glove compression once your hands are wrapped around the grips
That quick test catches most bad layering calls before they become expensive or miserable.
Quick Decision Flow for Fit Problems
Core is warm, hands are still cold
Check glove compression, cuff sealing, and wind exposure before chasing a hotter battery.
Hands are warm, feet are cold
Check boot fit, sock thickness, insole stack height, and whether your lower body is getting enough support from the rest of the setup.
Everything feels weak
Check the shell first, then the layer order, then the power side. A leaky shell and loose liner can make good heated gear feel bad.
You feel bulky and restricted
Replace thick passive layers with a proper heated mid-layer instead of trying to stack fleece, hoodies, and the heated garment together.
When Heated Gloves Beat Heated Liners
Heated liners can work, but they ask more from the rest of the system. The outer glove has to leave room for circulation, the cuff seal still has to work, and the rider has to avoid the compression trap that turns powered hands into cold hands.
Dedicated heated gloves solve more of that at once. They bring heat, weather protection, and glove structure in one piece. That is why riders who struggle with liner fit often do better by switching to heated gloves instead of forcing a liner into an outer glove that was never built around it.
Safety Notes
Also keep two safety points in mind:
- avoid direct long-term heat against bare skin
- do not let extra layers shift the outer armor out of place
A thin base layer between skin and heated garment helps comfort and reduces the chance of skin irritation. If your system still behaves strangely after fixing fit, run through the heated gear troubleshooting guide before buying more parts.
Direct Heat Against Skin Is a Bad Habit
Heated gear works best with a thin base layer between the heat source and your skin. That helps comfort, keeps sweat under control, and lowers the chance of low-level heat irritation from long exposure.
If a piece only feels warm when it is pressed directly onto bare skin, the setup probably has a fit or shell problem somewhere else.
Bulk Is a Safety Issue, Not Just a Comfort Issue
Over-layering does more than make the rider feel stuffed into the jacket. It can move armor, limit head checks, and make the controls feel clumsier because shoulders and elbows do not move the way they should.
That is why a thinner heated mid-layer often works better than stacking passive winter clothing underneath the shell. Less bulk usually gives you better movement and better heat transfer at the same time.
Seal the Openings Before You Turn the Heat Up
If cold air is pouring in through the cuffs, collar, or waist, the heated layer is spending too much of its effort replacing lost warmth instead of building comfort.
That is why draft control matters so much. Fix the openings first, then turn the heat up only as much as you still need.
Heated Base Layers Change the Fit Equation
Traditional heated liners sit in the mid-layer slot, but newer next-to-skin heated pieces change that logic a little. They can work well because they remove some of the air gap problem, but they still need careful skin comfort and shell-fit checks.
Tight Sport Jackets and One-Piece Suits Need a Different Plan
Not every rider has room for a full heated liner with sleeves. Sport jackets, race-fit leather, and some one-piece suits simply do not leave much space once armor and the normal base layer are already in place.
That is where riders need to get honest about what the shell can actually accept. A heated vest, thinner heated base layer, or a hand-first setup may make more sense than trying to jam a full jacket liner into a shell that already fits close.
Roomier ADV and touring gear is easier. Tight sport-focused gear forces better choices because the fit margin is smaller. That is not a bad thing. It just means the heated plan has to respect the shell instead of pretending every garment stack will fit every bike jacket.
Common Layering Mistakes
- wearing cotton under heated gear
- buying liners too loose
- forcing heated glove liners into tight outer gloves
- using a high-flow shell in deep cold
- ignoring armor shift after adding layers
- turning heat to max before fixing wind leaks and fit
Frequently Asked Questions
Should heated gear fit tight or loose?
Snug is better. It should sit close enough to transfer heat well without restricting breathing or movement.
Can I wear a thick hoodie under a heated jacket liner?
You can, but it usually hurts heat transfer and makes the whole setup bulkier than it needs to be.
Why do my hands get colder with heated glove liners?
Usually because the outer glove is too tight and the liner is cutting circulation.
Do I need to size my boots up for heated socks?
Sometimes. Heated socks and insoles both change boot fit, and tight boots can make warm feet feel cold again.
Are heated grips enough for winter riding?
Not always. They help the palm side, but wind still attacks the fingers and the back of the hand.
What is the best layer order for heated gear?
Wicking base layer, heated layer, then wind-blocking protective shell.
Should I set heat to max from the start?
Usually no. Seal drafts and fix fit first, then turn the heat up only as needed.
If you are tuning the whole winter kit, compare the heated jacket liner guide, the heated vest guide, and the heated pants liner guide before your next cold ride.