After writing the post on how to remove rust from your motorcycle chain, I wanted to put together another helpful chain maintenance guide.
This post is about how to clean and lube a motorcycle chain properly so that you can keep up-to-date with your motorcycle maintenance.
Keeping your chain clean and lubricated will extend its lifespan and make for a better ride. This maintenance will also help to extend the lifespan of your sprockets resulting in better overall performance.
In this article you’ll find a simple step-by-step on the best way to clean and lube a motorcycle chain. Don’t hesitate to head over to YouTube if you’re more of a visual learner.
This post is going to cover two different aspects of basic motorcycle maintenance:
- How to clean a motorcycle chain
- How to lube a motorcycle chain
This is the same strategy I use for maintaining the chain on my trusty CBR250R. So far I’ve gotten 20,000+KM’s of life from the stock chain and I’m expecting it to hit 30,000KM this season.
Let’s jump right into it!
Jump Ahead To:
How to Clean and Lube Your Motorcycle Chain
Step 1 – Determine Your Chain Type
The first step is to determine the type of motorcycle chain you’re using. This information will give you the best way to clean your chain without using any components that might be harmful.
There are two common types of chains – plain and sealed.
Sealed motorcycle chains, such as O-Ring, Z-ring, or X-ring chains, have links that are sealed with rubber. This seal is designed to keep grease inside the rings and helps to keep out road debris.
Plain motorcycle chains don’t come with any seals at all. These are design using metal-on-metal links and can be cleaned more aggressively.
Sealed chains, thanks to their design, typically have a longer lifespan. However, they need to be treated more carefully because of the rubber seal that can be susceptible to damage.
Once you determine the type of motorcycle chain your bike has you can move on to the next step.
Step 2 – Position Your Bike for Maintenance
The back of your bike needs to be easily accessible for cleaning and lubing the chain.
It’s possible to clean and lube your motorcycle chain with the bike on the ground but it’s not practical. It’s easier to use a rear stand or motorcycle lift to get your bike elevated for better access.
You want your bike positioned so that the rear wheel can spin freely. This gives you complete access to the chain so that you can efficiently apply your chain cleaner and lube.
If you’re touring, away from home, or you don’t have a stand – don’t worry. In this case you’ll need to clean/lube a small section of the chain at a time before physically moving your bike.
You could also remove the chain completely, though this isn’t a strategy I would personally recommend.
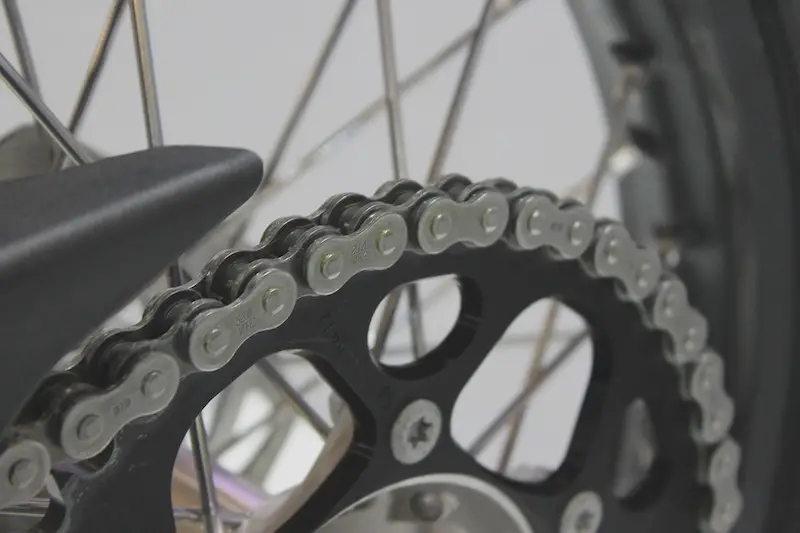
Step 3 – Visual Inspect the Condition of the Chain and Sprockets
This is a great time to inspect the condition of your motorcycle chain and sprockets.
Start by inspecting the chain itself. Look for anything that’s broken, cracked, or damaged. Check the links for any unusual wear and tear. Don’t forget to measure the chain movement to check if you need to adjust it.
Give the sprockets inspection as well. Check that they’re not broken or damaged in any way. Inspect the teeth and look for any signs of wear.
Sprockets are durable and in many cases can go the lifetime of the bike without needing to be replaced. Chains typically last 10-30,000 kilometres depending on your maintenance strategy.
You can also check your owner’s manual for accurate tips on how to properly maintain your specific bike.
It’s time to start the cleaning process!
Step 4 – Spray the Chain with Your Preferred Chain Cleaner
The first step in properly cleaning the chain is to loosen up all of the built-up grime and debris.
Wondering what’s the best motorcycle chain cleaner? There’s only one thing that I used for cleaning – kerosone.
Kerosene is the best for cleaning motorcycle chains. It sounds unusual but you’re bound to be surprised with how effective it is at breaking up and dissolving all of the gunk on your chain.
It’s also an affordable solution to the branded chain cleaners available online and at local motorcycle shops.
With your spray bottle, spray a small section at a time using a liberal amount of kerosene. Don’t worry, this isn’t going to damage your bike at all and it’s safe to use on your motorcycle components.
Assuming the rear tire is elevated, spin the tire while working on each part of the chain. After the entire thing is sprayed let it sit for 5-10 minutes while the kerosene Works its magic.
Step 5 – Get Scrubbing!
After the kerosene or your cleaning agent of choice has soaked the chain it’s time to start scrubbing. A motorcycle chain brush is the best way to physically remove all of the grease, old lube, dirt, and built-up debris.
These brushes are designed to thoroughly clean three sides of your motorcycle chain at once. You can position the brush to get all of the sides clean rather easily.
It’s best to work in small sections. Move on once the current section is clean, but don’t worry about getting it spotless at this point.
After going over the whole chain with the motorcycle chain brush, it’s a good idea to use a microfiber cloth to finish off. These cloths give you an even better cleaning ability so you can get your chain shining and spotless before applying any lube.
The motorcycle chain lube will stick to a clean surface more effectively than one that is still dirty.
Step 6 – Spray the Chain Again
Although the chain might look spotless at this point it’s a good idea to give it another spray using kerosene or your preferred cleaning agent. This will give you an even better chance of having a perfectly clean chain before you apply any lube.
Any debris or dirt that’s left behind will slowly work its way into the links. This can cause damage over a long period of time, especially if your chain is neglected from regular maintenance.
All of the cleaning steps above after your final spray application. At the end your chain will be clean enough to eat off of!
Step 7 – Dry the Chain
The chain needs to be dry in order for the motorcycle chain lube to be properly applied. Using clean microfiber cloths, fully dry the chain once it meets your standard of cleanliness.
Similar to the cleaning process, work in small sections to ensure each part of the chain is dry. Don’t forget to wipe down the sprocket to remove any excess moisture.
You could even use a hair dryer, fan, or space heater if you wanted to take it to the next level.
With the chain completely dry you can finally start the lubrication process.
Step 8 – Lubricate Your Motorcycle Chain
If you’re happy with how clean and dry the chain is it’s time to apply the lubricant. You can use any of your favorite lubes for this process.
Personally, I recommend anything from Motul. I’ve been using these products exclusively on my bike and haven’t experienced any issues.
There also isn’t a single best way to lube a motorcycle chain. You could follow the directions on the back of the spray can or use any technique you prefer.
Start by spraying the chain in small sections while you rotate the back wheel. Once it’s evenly coated apply some chain lubricant to the spot where the chain meets the sprocket. Feel free to remove the front sprocket cover if you want to lubricate that area as well.
After applying the chain lubricant to the chain wipe off any excess lube and you’re good to go!
Keeping Up With Chain Maintenance
Motorcycle chain maintenance it’s an important part of owning a bike. To avoid any issues when you’re out riding follow your manual to see how often to change needs to be cleaned and lubricated.
There’s no need to go overboard here unless you’re riding in excessively wet or salty conditions. Most people would be good too performance maintenance every 500 to 2500 kilometres, though it’s up to you to determine what your bike needs.
Hopefully this guide has helped you out with maintaining the chain on your motorcycle. If you have any questions or concerns, don’t hesitate to let me know down in the comments!