
Whether you’re restoring an old motorcycle or doing some preventative maintenance, there may come a time when you need to seal a gas tank. This is especially common with older gas tanks or those that have set empty, or half full, for too long.
Moisture gets inside, the rust process starts, and corrosion starts eating away at the inside of the tank. This can lead to exposed seams, pinholes, or rust spots you want to get rid of.
Even when you remove rust from a motorcycle gas tank, it needs to be quickly sealed to avoid any flash rusting from happening. To do this effectively it’s a good idea to use the best motorcycle tank sealer you can get your hands on.
In this post we’ll be looking at the best motorcycle tank sealers on the market currently available. Any of these should be able to help you out during your restoration, repair, or preventative maintenance process.
Let’s jump right into it!
Jump Ahead To:
The Best Motorcycle Tank Sealer
KBS Coatings Fuel Tank Sealer Kit (Best Motorcycle Tank Sealer Overall)
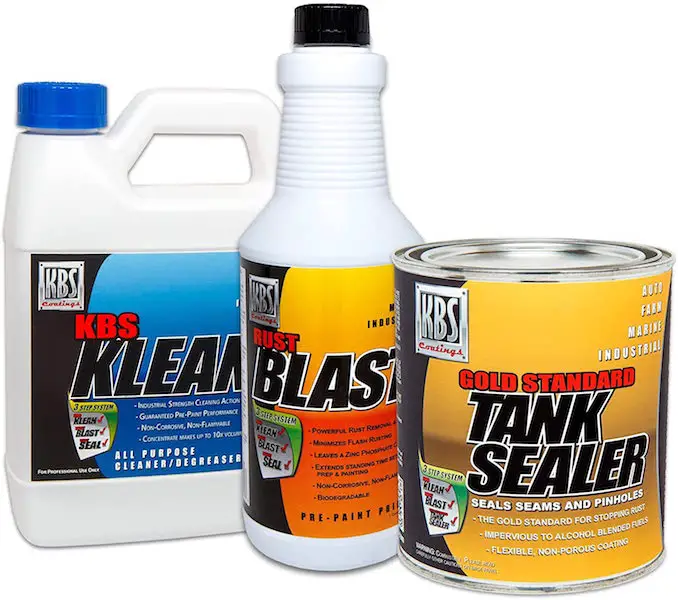

The KBS Coatings Fuel Tank Sealer Kit is our recommendation as the best motorcycle tank sealer for most people. This is a kit that comes with everything you need to restore and seal a tank without the need for a professional.
Included in this kit is a fuel tank sealer, a heavy duty, water-based cleaner/degreaser, and a powerful rust removal product. These different products make it possible for you to get a permanently sealed and rust free fuel tank.
With this kit it’s possible to remove rust and seal gas tanks up to 25 gallons in size. You can use it for removing rust, sealing pinholes, sealing welding seams, and restoring an old gas tank to its former glory.
The sealer used for sealing the gas tank is flexible, meaning it expands and contracts with the fuel tank. It’s not going to crack or start flaking off if the gas tank happens to expand or contract due to heat, fuel temperature, or other outdoor conditions.
Included in the kit are detailed directions. There are a number of helpful videos available online if you are having difficulty using these different products.
Generally, it’s easy to use the different products included in this kit for restoring and sealing your gas tank. Once the sealer is fully cured, it creates a durable and very hard skin that allows your fuel tank to operate as intended.
Although it’s going to take a few hours to get the job done, the KBS Coatings Fuel Tank Sealer Kit is the best motorcycle tank sealer for most people. It comes with everything you need to restore an old and rusty gas tank so you can keep using it on your bike.
POR-15 Fuel Tank Sealer
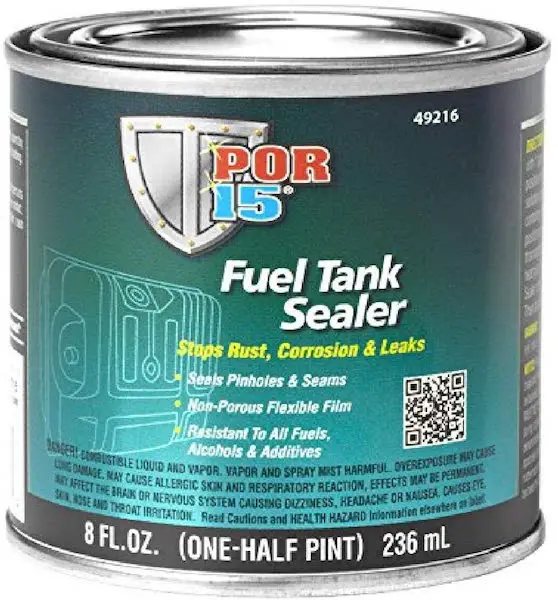
The POR-15 Fuel Tank Sealer is specifically designed for sealing the gas tank and permanently Sealing pinholes and seams. This is a great product to use after removing rust and restoring an old gas tank before adding fuel.
This gas tank sealer uses a special formula to stop rust, prevent corrosion, prevent fuel leaks, and to seal cracked seams and pinholes. The liquid sealer bonds to the inside of your gas tank using a light grey and non-porous flexible film.
After pouring it into the gas tank, it’s as easy as shaking it around so that it covers all the surfaces. After it dries, it will leave a rough surface behind, but it shouldn’t be an issue as no one is looking inside the tank.
One of the benefits of the POR-15 Fuel Tank Sealer is that it is a high-tech sealer. This makes it possible to use with new stage II fuels, which happen to be more corrosive and contain more alcohol.
What makes the POR-15 Fuel Tank Sealer such a popular choice is its strength and fuel resistance. You can even use it in conjunction with other rust removal or metal prep chemicals as a way to effectively prepare and clean out the inside of a rusted or damaged fuel tank.
Overall, the POR-15 Fuel Tank Sealer is another great choice if you’re looking for a practical and reliable motorcycle gas tank sealer. It comes in a small, 8-ounce can, which is more than enough for most gas tanks.
POR-15 Cycle Tank Repair Kit
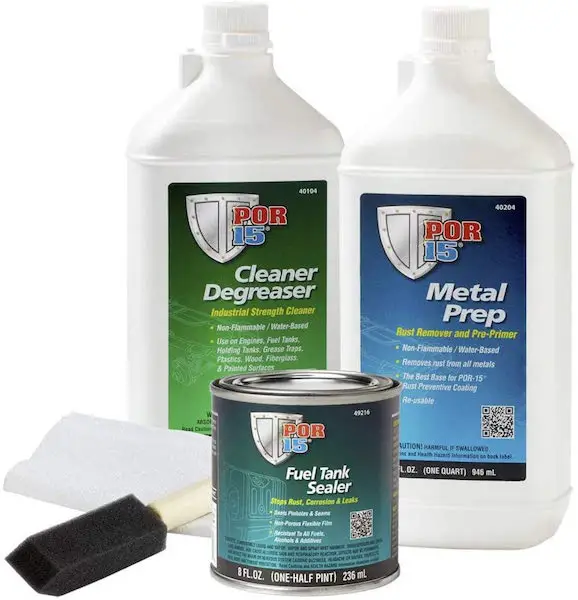
The POR-15 Cycle Tank Repair Kit is another great choice if you’re looking for a motorcycle gas tank repair kit. Along with a fuel tank sealer, this kit comes with a rust remover and industrial-strength cleaner.
These products are highly effective at removing rust and preparing the inside of a damaged or aged motorcycle gas tank. It has everything you need to restore a fuel tank so that it can be used again without any issues.
Starting with the cleaner and degreaser, its product is perfect for cleaning the inside of a gas tank. Next, the metal prep has been specially formulated to remove rust from all metals.
After using the first two products, the inside of a gas tank is ready to be sealed. The metal prep formula leaves behind the perfect base for applying the fuel tank sealer. It’s even reusable, so you can use it on a few different gas tanks during the restoration process.
Finally, the fuel tank sealer is ready to be applied. This is necessary for stopping rust and preventing corrosion and leaks while sealing pinholes and seams.
Overall, the POR-15 Cycle Tank Repair Kit is another fuel tank restoration kit that comes with everything you need to remove rust and bring your old motorcycle fuel tank back to life. This is a great choice for seriously damaged tanks that require a lot of work for the restoration process.
Why Use a Motorcycle Tank Sealer?

Revitalize an Old Gas Tank
This is a great product to use for revitalizing or repairing an old gas tank. If you’re working on an old bike, you may have opened the gas tank and found rust or damage inside.
Instead of having to replace it, you can use a tank sealant to reseal the tank. This will save you money, prevent leaks, and make it easier for you during the restoration process.
Save Money on Restoration
Replacing the fuel tank can cost hundreds of dollars. Even used motorcycle fuel tanks aren’t cheap, if you can even find them online or from another marketplace.
With a motorcycle tank sealer, it doesn’t cost that much to seal the inside of an old tank. This can help to prevent rust and repair any damage, such as pinholes and leaks.
Instead of having to spend money on a new tank, you can use that part of your budget for other areas of restoration. It doesn’t hurt learning how to repair a motorcycle gas tank either.
Environmentally Friendly
Although some of these sealers use somewhat harsh chemicals, it’s better than throwing away your old gas tank. Repairing and reusing your gas tank means it’s being recycled, instead of thrown away.
This saves you money and keeps more junk out of the landfill. You can be proud knowing you repaired something on your own and did the environment a favor as well.
Types of Motorcycle Tank Sealers
Fuel Tank Sealer Kit
Whenever you’re repairing a fuel tank, you need to start with cleaning and prepping the gas tank. This means removing any rust or debris and fixing any corrosion.
This is no easy task, especially if you don’t have the right gear. Thankfully, buying a fuel tank sealer kit means you’ll have everything you need to get the job done.
These kits are usually equipped with a rust remover, cleaner, degreaser, and of course the tank sealer. Some of them even come with extra supplies like gloves and brushes, to make the process even easier for you.
Epoxy or Adhesive
Instead of buying a kit, you could use a special epoxy or adhesive for sealing the inside of the tank. With these products you’ll still need to properly prepare the inside for these products to work correctly.
The benefit of using epoxy or adhesive is that it’s slightly cheaper than buying a kit. On the other hand, it does require a little more skill and there is some more room for error.
Gas Tank Sealer Features
Fuel Resistant
The most important feature to look for with any motorcycle tank sealer is that it’s fuel resistant. That should be obvious, as you’ll be adding fuel to the tank as soon as it’s sealed on the inside.
The problem with using a sealer that isn’t fuel resistant is that the fuel will eventually eat through the sealer. This will prevent it from working properly and can clog the fuel pump as well as other internal components on your bike
Keep an eye out for motorcycle specific gas tank sealants. These tend to be fuel resistant. Some adhesives and epoxies are as well, though you’ll want to verify this before using them.
Color
Some motorcycle tank sealants are clear, while others come in a very bright color. Having a brightly colored sealant can make it easy to see if it’s properly applied inside the gas tank.
This makes it easy for you to determine if you missed any areas or if everything is properly covered. Alternatively, many of them come in a clear color, which can be harder to use if you’re not familiar with motorcycle gas tank restoration.
Set and Curing Time
Difference sealers will have different set times and curing times. This is the time it takes for the product to set and cure inside your motorcycle fuel tank.
Some products will set in minutes and take an hour to cure. Others won’t cure completely for up to 24 hours or more.
During this process you need to be patient, especially when you’re cleaning and preparing the gas tank before applying a sealant. Depending on the product you’re using, it can take a few days to finish the project.
Double check the instructions to see how long it’s supposed to take for a sealer to cure and set. This way you’ll be best prepared for sealing the tank properly and efficiently.
Size
Don’t forget to consider the size of your gas tank as well as the size capabilities of the sealing product you’re using. Double check the specifications or instructions to see how many gallons the sealant is able to cover.
If you’re only restoring one gas tank, you won’t need a sealer that covers 25 gallons. Look for a formula that comes in a smaller can or tube that more accurately matches the size of your fuel tank.
Helpful Tips
Always start by fully cleaning the inside of the gas tank before applying any sealer. It’s easier to remove the tank from the motorcycle, drain the fuel, and remove any internal fittings.
Before pouring in the sealer, tape over any holes. You don’t want it to leak out before it’s able to set and cure. After pouring it in, move the tank around to make sure it coats the entire interior. Give it a few moments and then drain out any excess sealer.
Follow the instructions and let the sealant dry. This can take between 8 and 24 hours depending on the product you’re using. Once it’s fully dry, reassemble the fuel tank and connect it back on the motorcycle.
FAQ
How Long Does it Take For Motorcycle Tank Sealer to Dry?
This depends on the brand you’re using. Refer to the instructions to see exactly how long it takes for the sealer to dry.
It can take anywhere between 8 hours and 24 hours for everything to be completely dry. Always read the instructions and double-check that the sealant is dry before reattaching and adding fuel to the tank.
Do You Need to Take the Gas Tank Off to Apply Sealer?
Although it’s not completely necessary, it’s a lot easier to remove the gas tank to apply the sealer. By removing the tank, it’s easier to make sure the sealer is coating the entire interior.
Trying to do it on the bike without removing the tank is difficult and less effective. There are helpful videos on YouTube if you’re having difficulty removing the tank or if you’re not sure how to do it.
What Do You Do If Sealant Dries on the Outside of the Tank?
Try to avoid getting sealant anywhere outside of the tank. It can be difficult to remove and it’s possible to damage the paint on your motorcycle.
Should you get some stuck, use 300-grit sandpaper or a green pad scrubber to remove any sealer. Be careful to avoid scratching the gas tank on the outside or damaging the paint.